Riverside.FM is one of the most popular remote recording software on the market, but what exactly makes it so good? In this Riverside.FM review, we’re going to dig into the pros and cons, unique selling points and pricing plans to give you a full view of what exactly the company has to offer for budding podcasters.
If you’re looking for some insight into the capabilities of the platform as well as a brief tutorial on how to use it, this blog has all the information you will need.
1. What Is Riverside.FM?
Riverside primarily specializes in remote audio and video recording. Their technology records each participant in an interview or meeting locally, no matter where they are in the world. This means that even if you have connectivity issues, it won’t affect the recording because each person’s audio and video are captured separately, on their own device. Essentially, this helps to reduce stuttering audio and glitchy video.
Riverside has a particular focus on podcasts, but also advertises its services to webinars, virtual conferences, online panel discussions and general internal communications.
2. Pros and Cons of Riverside.FM

2.1 Pros
1. Superb Audio and Video Quality
The first thing to mention in any Riverside.FM review is that the company offers users lossless audio. In other words, they don’t lose any data or frequencies when the sound input is converted into a digital format. In fact, all audio is uncompressed. This of course means the files are larger but also means you won’t experience a reduction in quality. On the video side, you can record up to 4K resolution, which is as much as you would want today for video podcasting. Obviously, bear in mind that if you have basic microphone and/or camera equipment, Riverside’s software will not be able to magically enhance your recordings.
2. Cost-effective
While they used to be a bit expensive, Riverside dropped their prices last year to make their platform very cost competitive. The debate may continue in the remote recording software market about which is better, SquadCast or Riverside, however Riverside is certainly cheaper. Plus, Riverside have ditched their paid Basic subscription in favor of offering a free tier.
3. Mobile-friendly
Apps for both Android and Apple mobile devices are available for Riverside. Using this app, you can invite co-hosts or guests to join you for a show, then record the audio and video using the phone’s mic and camera. You can either record the video vertically or horizontally with up to 1080p HD resolution, though again, this is dependent on the specifications of your mobile model. At the beginning of this year, Riverside also released an app optimized for iPads, so you can now record from your tablet as well.
4. Extended Customer Support
One of the top things that people searching for a Riverside.FM review seek is information on the company’s customer support. There are two principal avenues that Riverside offers: live chat and email. The company is really good at highlighting this, with various links, buttons and tabs built throughout the software to access these options via the recording studio, editor and dashboard, as well as the main website itself. There’s also a list of standard issues and queries available via the help center.
2.2 Cons:
1. Substandard Free Plan
A lot of original Riverside.FM issues have been fixed over the past few months as the company has grown in experience. While their free plan isn’t the least generous one you’ll see on the market, the low resolution, watermarked recording, and combined audio-video track make it an unattractive prospect for anything other than a trial.
Then again, that’s quite clearly rather the point – Riverside naturally wants to push you into signing up for a paid subscription.
3. Key Features

3.1 Magic Editor
Riverside’s editor is great for beginners or people who don’t want to spend a lot of time finessing their audio and video. Automated tools can weave together the separate local recordings to sync them up, cut out background noise and normalize the sound levels.
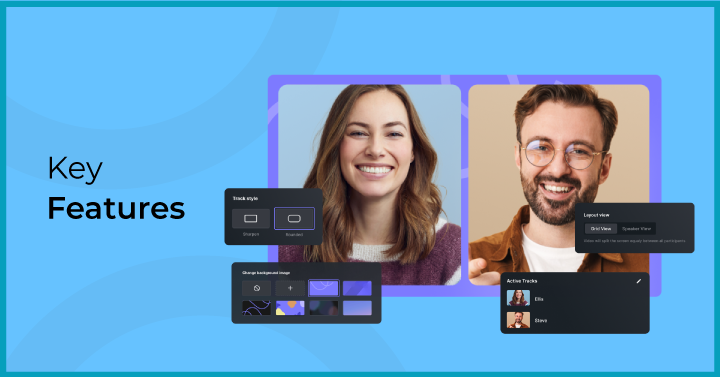
3.2 Automated Speaker View
Another feature that facilitates editing for video podcasters is the AI speaker view. This automatically makes the video feed from whoever is speaking full screen, so that you don’t have to personally cut between the various recordings.
3.3 Media Board
The Media Board consists of a series of pre-recorded sounds and videos you can add to your recording, such as drum rolls or laugh tracks. You can also upload your own media, such as a theme tune, to the interface for inclusion in your podcast.
3.4 Customizable Backgrounds
The customizable backgrounds feature may be a minor note in this Riverside.FM review, but it is a handy one. Using the editor, you can add whatever artwork you want to jazz up your recordings. You can also watermark each finished episode with your brand logo.
3.5 Social Streaming Capability
Riverside allows you to live stream your podcast to a bunch of social media channels, including YouTube, TikTok, LinkedIn, Facebook and Twitch. In fact, you can simulcast to several different platforms at the same time, using the Media Board to add sound and effects in real time. Bear in mind that these recordings will have lower resolution than pre-recorded clips.
3.6 Live Listener Call-ins
If your audience is using the Riverside platform to listen/watch your podcast live, they can request to ask a question. This gives hosts the option of introducing live call-ins into their show at the click of a button.
3.7 Progressive Upload
If you read Riverside.FM review Reddit threads, the progressive upload feature is one of the first things highlighted. Basically, it means that any interviews you conduct will be continuously uploaded to the Riverside cloud. You won’t lose any audio or video due to poor connection. Even if the line drops, there will be a copy of the recording up to that point that you can download.
3.8 Backup System
Internet backups are a useful way to review your recordings with your guest while waiting for the larger locally recorded files to upload to Riverside or download to your computer. It’s important to note in this Riverside.FM review, however, that the video is not as high quality as the local recordings, since they are captured in real time over the internet.
3.9 Mobile App Support
As mentioned above, Riverside supports multiple mobile devices. If you hit any snags, there’s a comprehensive list of FAQs in their support center. Plus, you can always email in or enter a live chat.
3.10 Live Streaming Support
Just like with the mobile app, there’s a team of people responding to issues through email and live chat. However, with live streaming, you’ll need to bear in mind that you may not receive a response as quickly as you might like or need. There’s a list of common FAQs here.
4. Pricing of Riverside.Fm

4.1 Free Tier
Riverside.FM pricing starts from absolutely nothing. Admittedly, you’ll have fairly limited functionality with the Basic package, but you will still get unlimited single-track recording and editing, as well as unlimited calls. For video podcasters, note that video and audio will be automatically merged, so you won’t have the option to edit these separately. That feature is only available as a kind of trial: each basic user gets just a single 2-hour recording with separate audio and video tracks per month.
The free version of Riverside also only goes up to 720p video resolution and 44.1 kHz audio quality. Plus, all your videos will be watermarked with the Riverside logo.
4.2 Standard
If you don’t want to have Riverside’s brand on your content, you’ll need to opt for a paid tier. The Standard subscription is $15 per month if you pay for the whole year upfront or $19 if you pay in 12 installments. For this, you get 5 hours of separate audio and video tracks per month – you can spread this over as many recordings as you like.
You will also get access to the screen sharing and live social streaming capabilities. Video quality goes up to 4K and audio quality up to 48 kHz.
4.3 Pro
Once your podcast has taken off, you might want to opt for the $24 a month Pro subscription ($29 if paid monthly). This comes with everything in standard, but with the addition of unlimited transcriptions of your interviews. More importantly, you will be able to record up to 15 hours of separate audio and video tracks per month – more than enough to host a regular podcast show.
4.4 Teams
Riverside offers custom packages for companies that want to utilize their services for remote recordings of meetings or keynote speakers, etc. As part of the offering, businesses can take advantage of a whole host of unique features, including custom branding and in-company control of their own platform. Pricing is available on request.
5. Riverside Podcasting Tutorial
So far, we’ve dug into the star features and pricing plans in this Riverside.FM review. Now, it’s time to take a closer look at the different parts of the software.
5.1 The Dashboard
The dashboard is divided into four principal areas. The first is the main dashboard. Here, you’ll see all the studios associated with your account, as well as a button to create new studios. From this page, you can enter each studio, view all recordings associated with a studio and invite people to join a studio. There’s also a gear button to reach the settings page for each studio.
From the main dashboard, if you click the ‘Enter Studio’ button, you’ll reach the studio page itself. This is where you will do most of the recording associated with your podcast. Dominating the screen is the area where your video will appear. Before you start, this will mainly be occupied by instructions on how to invite people to your call. As well as the buttons to control mics, cameras and headphones, you can edit guests’ sound levels and add additional effects (as explained in the Media Board section above). There’s a tab to access live chat if you require assistance.
The main dashboard also gives you access to the recordings page. Here, you’ll be able to see all the recordings you’ve made so far, with thumbnails and accompanying dates and times. You can share these with other people using the buttons at the top of the page.
Click on one of your recordings and you’ll enter the final essential area: the recording take page. This is where you preview and edit your recordings. At the very top of the page, you can see icons of all participants and whether their local recording has been fully uploaded to Riverside. The three dots button to the right will give you the option to download your audio and video tracks, plus the internet backups. You’ll also see a button in the top right labeled ‘Go To Editor.’ Click it and you’ll be taken to Riverside’s editing platform, where you can cut the audio and video, normalize sound levels and remove background noise, before merging the tracks and exporting the final recording.
Beneath this is the list of any clips and snapshots you took during your recording, which you can share on social media – or wherever you like! At the very bottom of the page, you can download the separate audio and video tracks to your device.
5.2 Settings
The settings panel is available from the main dashboard. Here, you can decide whether a studio is public or private, enable or disable the waiting room feature, and select the quality of live calls. You can also select whether you will be doing an audio-only or audiovisual recording, adjust the quality of the video and audio recorded, and turn noise suppression on or off. If you are planning to stream live to your social media platforms, you can toggle these on or off here as well.
5.3 Mobile App
The Riverside mobile app is designed mainly for inviting and recording guests, since it doesn’t provide access to the same features as the web interface. The first time using the app, it will ask for access to the camera and microphone. Once these terms have been accepted, the app will ask for a name.
The user can then check their camera and microphone. Once that’s done, you’re all set to record! Just make sure at the end your guest leaves the app open so the local recording can upload to the Riverside cloud.
6. Verdict: Is Riverside Podcasting Worth It?
After running down all the features, pros, cons and prices, the final question is, is Riverside.FM good for podcasting? While there are several Riverside.FM alternatives, what makes this company stand out for podcasters is the ease of use.
The software will take most of the hard work out of your hands, so you can focus on actually creating the content. Another major strength is the platform, which has a very user-friendly design, making it a breeze to get started right away.
7. FAQs
- Is Riverside FM easy to use?
Yes. In fact, ease of use is one of the major attractions of Riverside. Most functions are automated for you, so that you don’t need to be particularly technically savvy. The studio interface has a simple, easy to understand layout. If you do run into trouble, the support center has guides and answers to frequently asked questions
- Is Riverside FM better than Zoom?
For remote audio and video recording? Absolutely. The quality of the sound and image output is much higher on Riverside.FM vs Zoom. Plus, it has been optimized for creating podcasts, so has more sophisticated tools in this regard.
- Is Riverside FM secure?
Riverside is SOC 2 Type 2 compliant. This means they have been audited by a third party to ensure they securely handle sensitive client data and information.
- How long can you record on Riverside FM?
That depends on your package and the type of recording you want to make. The Basic tier allows just 2 hours of separate audio and video track recording per month, while the Pro tier boasts 15.


