Did you know that Apple Podcasts houses one of the largest and most popular podcast directories? With over 1.5 million shows and 100 billion downloads, Apple Podcasts is the go-to platform for podcast listeners everywhere. Irrespective of what kind of podcaster you are, getting your show on Apple Podcasts should be at the top of your to-do list. But how can you make sure your podcast is available on this platform? That’s where we come in!
In this blog, we’ll take you through the ins and outs of putting your podcast on Apple Podcasts, from creating an account to optimizing your show for maximum visibility. This way you can concentrate on creating and executing better content for your audience.
1. What are Apple Podcasts?
Apple Podcasts are a podcast directory and not a podcast hosting platform. This is the best way to describe the platform. Apple Podcasts allows listeners to subscribe to their favorite shows and download episodes to listen to offline. It also offers features such as personalized recommendations and the ability to speed up or slow down playback.
For podcasters, Apple Podcasts provides a way to reach a large audience of listeners, increase their visibility, and grow their fanbase. To get started on Apple Podcasts, podcasters need to create an account, submit their show for approval, and optimize their listing for maximum visibility. Overall, Apple Podcasts plays a crucial role in the podcasting ecosystem and is an essential platform for any podcaster looking to reach a wider audience.
Some other famous podcast directories apart from Apple Podcasts are Spotify, Stitcher, and TuneIn.
2. What is Apple Podcasts Connect?

Apple Podcasts Connect is a web-based platform that allows podcasters to manage and distribute their podcasts on Apple Podcasts, one of the world’s largest podcast platforms.
By creating an account on the platform, podcasters can submit their podcast to Apple Podcasts for inclusion in the platform’s directory. They can also manage their podcast’s metadata, such as the title, description, and artwork, and track its performance using analytics data.
In addition, Apple Podcasts Connect allows podcasters to schedule and distribute new episodes, as well as update and remove existing ones. They can also receive listener reviews and ratings, respond to listener feedback, and monitor their podcast’s performance in search rankings.
It is free to use, and podcasters can create an account by signing in with their Apple ID. Once their podcast has been submitted and approved, it will be available to millions of listeners worldwide on Apple Podcasts.
3. Creating an Apple Podcasts Connect Account
3.1. Creating an Apple ID
Creating an Apple ID is a simple and secure way to get access to all of your favorite Apple products and services. With just a few clicks, you can create an Apple ID that will give you access to the App Store, iTunes Store, iCloud, iMessage, and much more.
The process is straightforward: open the Apple website or launch the App Store on any iOS device and click “Create Your Apple ID”. You’ll be asked for some basic information such as your name, birth date, email address, and a strong password. Once your account is created, you’re ready to start downloading apps or purchasing music from iTunes.
You can also add payment methods like credit cards to purchase content from the App Store or iTunes store. If you ever need to reset your password or update any personal information associated with your account, simply access your Apple ID page in Settings on iOS devices or Account Settings in iTunes on Macs and PCs.
3.2. Logging into Apple Podcasts Connect
This is the first step to getting your podcast on the platform. All you need is an Apple ID and a few moments of your time.
To log in, open the website or launch the App Store on any iOS device and click “Sign In”. Enter your Apple ID credentials and click “Sign In” again. Once inside, you will be presented with all of the available options for managing and distributing your podcast content including creating new shows, setting up access restrictions, and submitting your RSS feed for approval.
If you ever need to update your account information or reset your password, simply access your Apple ID page in Settings on iOS devices or Account Settings in iTunes on Macs and PCs. With just a few clicks, you can easily manage all of your podcast content from one centralized hub – Apple Podcasts Connect.
3.3. Setting Up Your Account Information

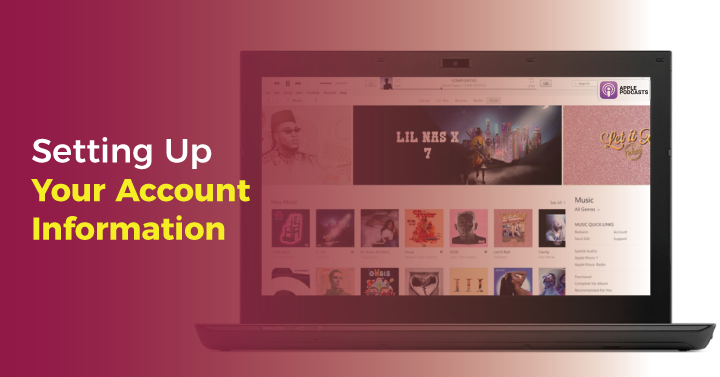
Now that you have successfully logged into Apple Podcasts Connect, you need to set up your account information. This includes giving your podcast a name, selecting an artwork image, setting up an iTunes Store page, and providing contact information for any inquiries.
To start, click “My Podcasts” in the top navigation bar. Here you can create a new show or manage existing podcasts. When creating a new show, enter the name and description of your podcast. Next select an artwork image for your show’s cover art. Make sure that it is at least 1400 x 1400 pixels in size and has a maximum file size of 3MB. Once complete, click “Save” and you are ready to move on to the next step.
Next you will need to create an iTunes Store page for your podcast by entering its language, category (e.g., comedy), age rating (if applicable) as well as other relevant information such as copyright and ownership details. After completing all sections, click “Submit” and wait for Apple Podcasts’ approval before sharing your podcast with the world!
Finally, provide contact information so listeners can get in touch with you regarding any questions they may have about your podcast content or feedback they would like to share with you directly via email or social media accounts. Doing this will help keep communication channels open between yourself and fans of your podcasting content.
4. How Do You Create an RSS Feed ?
4.1. Choose an RSS Feed Generator
There are several free and paid RSS feed generators available online that can help you create your feed. Some popular options include FeedBurner, RSS.com, and Podbase.
4.2. Enter Your Podcast Information
Once you have chosen an RSS feed generator, you will need to enter your podcast’s information, such as the title, description, author, and cover art. You may also need to enter the URL of your podcast’s website or blog.
4.3. Add Your Podcast Episodes
After entering your podcast information, you will need to add your podcast episodes to your RSS feed. This typically involves entering the episode title, description, and media file URL.
4.4. Verify Your Feed
Once you have added your podcast episodes, you will need to verify your feed to ensure that it is valid and conforms to RSS standards. You can use an online feed validator tool to check your feed for errors.
4.5. Publish Your Feed
Once you have verified your feed, you can publish it to your podcast hosting service. Your hosting service will then distribute your feed to platforms like Apple Podcasts or if that is not something your podcast
5. Reviewing and Publishing Your Podcast

5.1. Waiting for Podcast Approval
Once you have submitted your podcast to Apple Podcasts, it is time to wait for the approval. This process can take anywhere from a few days to several weeks, depending on the content of your podcast and other factors. During this time you should make sure that all of the information about your podcast is accurate and complete, as this will help speed up the process.
Additionally, double-check that all artwork images and contact information are correct before submitting. While waiting for approval, consider promoting your show by sharing it on social media sites or sending out newsletters. With a bit of patience and dedication, you’ll soon be able to share your podcast with listeners around the world!
5.2. Reviewing and Responding to Feedback from Apple Podcasts
Once your podcast has been approved by Apple Podcasts, it’s time to start engaging with your listeners. As your show grows in popularity, you may begin to receive feedback from different sources. In addition to ratings and reviews on the platform, you may also receive emails or messages on social media sites.
It is important to take the time to review all of these comments and messages. Not only will this help you understand what aspects of your podcast are resonating with people, but it is also a great way to build relationships with your listeners. Take their feedback seriously and respond in a polite manner that shows you value their input. Additionally, whenever appropriate, be sure to thank them for their support of the show. Doing this will ensure that your audience feels appreciated and encourages them to keep listening!
5.3. Publish New Episodes
Once your podcast is approved, you can publish new episodes by uploading them to your hosting service. The RSS feed will automatically update, and the new episode will be available on Apple Podcasts for your listeners to enjoy.
6. FAQs
- What is an RSS feed?
An RSS feed stands for Really Simple Syndication and is a form of web feed format that is used by podcast directories to display podcasts.
- How much does it cost to put a podcast on Apple Podcasts?
It is free to put a podcast on Apple Podcasts.
- How do I upload podcasts to Apple Podcasts?
To upload your podcast, you need to create an Apple ID, sign in to Apple Podcasts Connect, add your podcast’s RSS feed, and submit it for review.


